
How to Create a Ticketed Event in Our Mayberry
A simple, friendly step-by-step guide for admins and event organizers
Our Mayberry gives you a powerful and flexible way to sell tickets, manage attendees, offer add-ons, and run smooth check-in at your event. This guide walks you through every step from creation to check-in.
1. Add Event Details
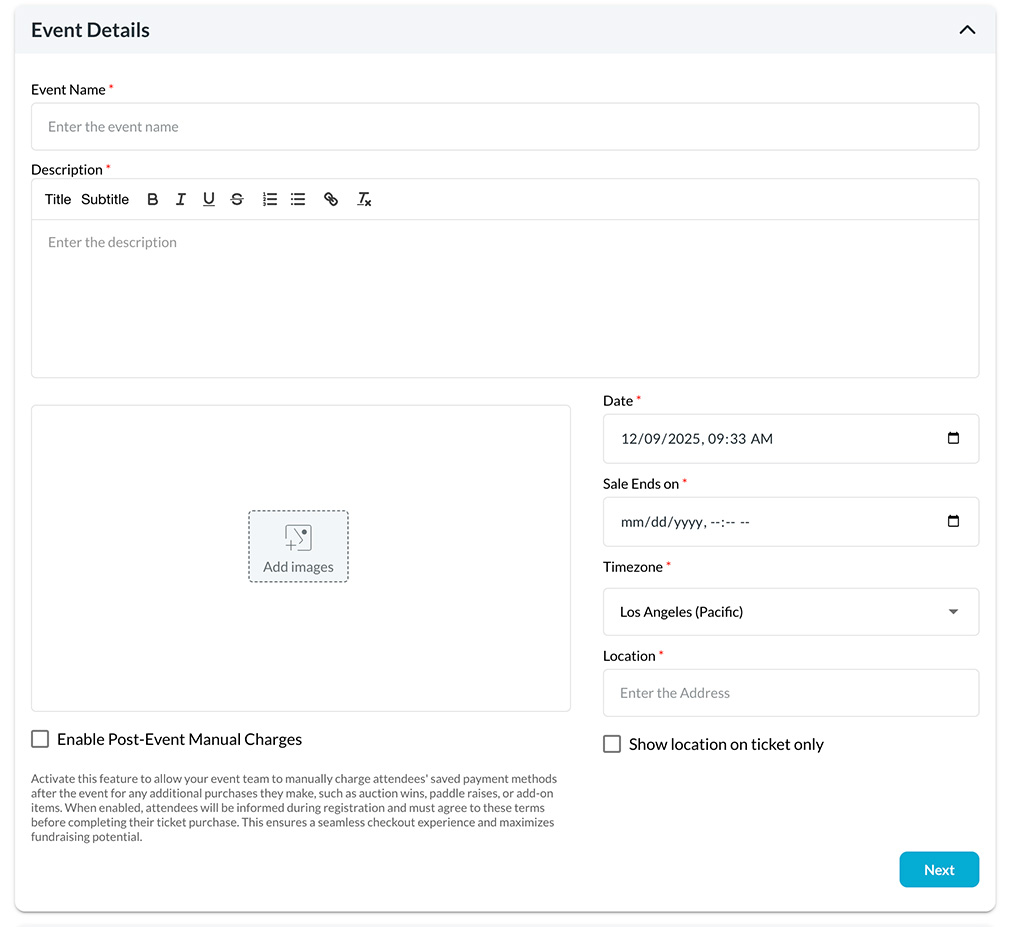
Start by entering the basics of your event:
- Event Name
- Description (you can add formatting and images)
- Supporting Photos
- Event Date & Time
- Ticket Sales End Date
- Time Zone
- Event Location
Optional: Show Location Only on Tickets
If you prefer not to display the location publicly, you can choose to show it only on the attendee’s ticket.
Optional: Enable Post-Event Manual Charges
Turn this on if your event includes things like auctions, paddle raises, or extra post-event purchases.
Attendees agree during checkout that your team may charge their saved payment method after the event.
Click Next to continue.
2. Set Ticket Details
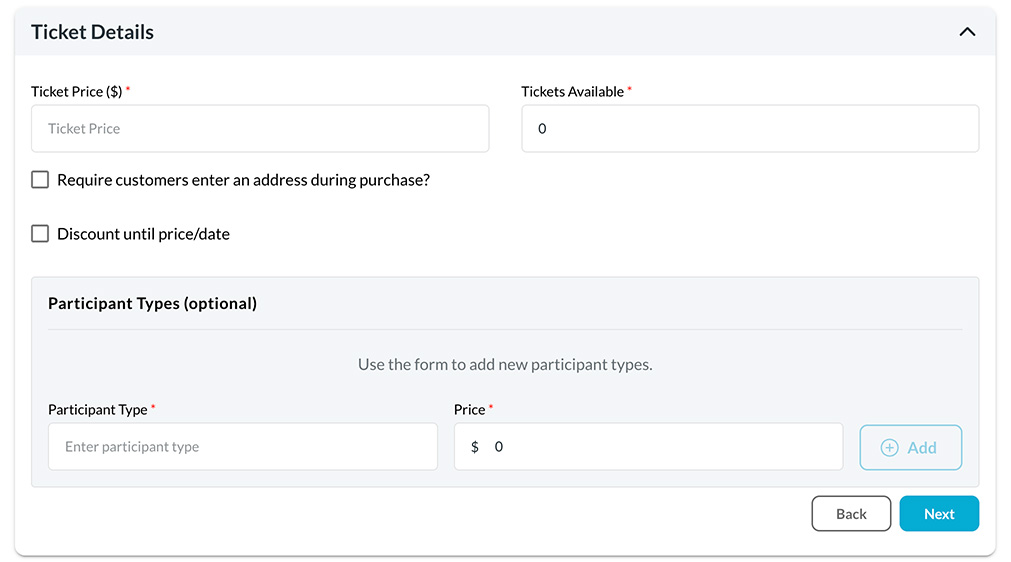
This is where you configure your main ticket.
You’ll enter:
- Ticket Price
- Number of Tickets Available
Optional Settings:
- Require attendee mailing address
- Create discounted early-bird pricing
Date-Based Discounts
Create as many discount periods as you want. The price automatically adjusts based on purchase date.
Example:
- 30+ days before event → $50
- 15–29 days before event → $70
- Full price → $100
Participant Types (Optional)
You can offer different attendee categories (such as Teacher, Student, General Public) with their own pricing if needed.
Click Next to continue.
3. Add-Ons (Included or Extra Items)
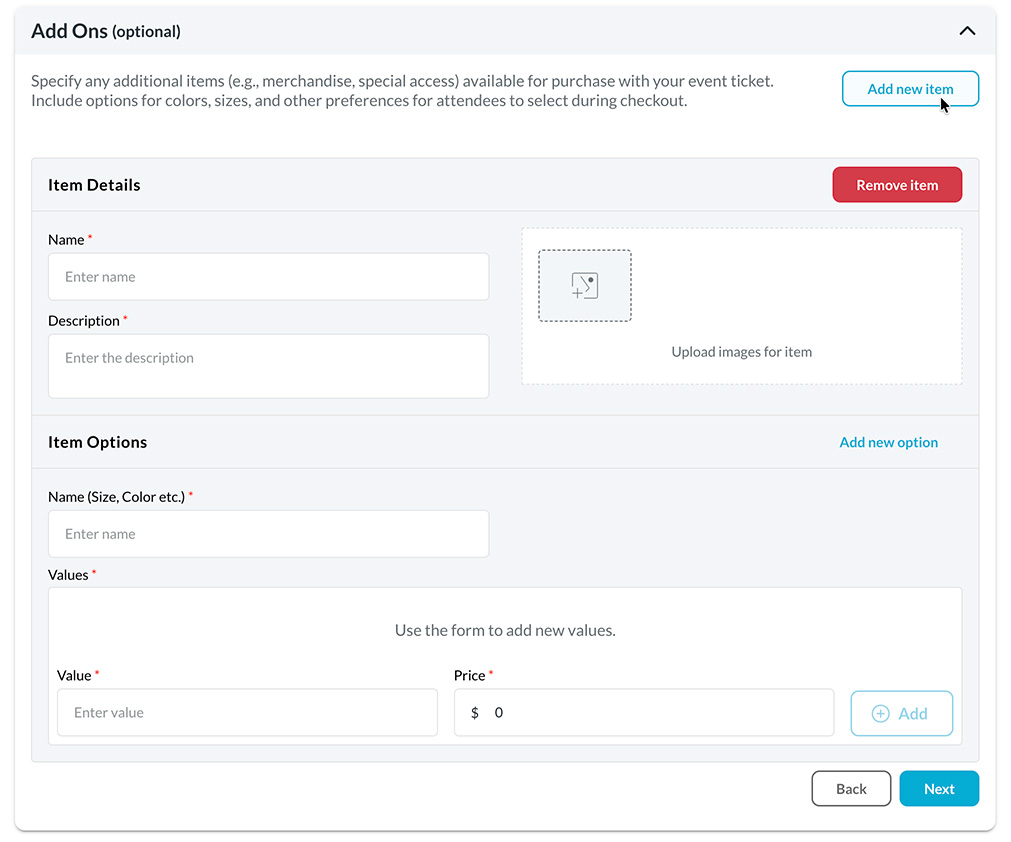
Add-ons give you flexibility to offer items that are included with the ticket or optional purchases.
Common uses include:
- T-shirts or swag
- Meal choices
- Parking passes
- VIP upgrades
- Workshops or add-on activities
Each add-on can include:
- Item name
- Description
- Photos
- Options such as size, color, meal type
- Additional pricing for certain options
Example: A short-sleeve shirt might be included with the ticket, while a long-sleeve version costs an additional amount.
Add as many items and options as needed.
Click Next to continue.
4. Create Packages (Optional)

Packages allow you to bundle tickets or add benefits.
Examples:
- Sponsorship packages
- VIP bundles
- Family packages
- Group ticket discounts
Each package includes:
- Name
- Short and full description
- Package price
- Number of tickets included
- Maximum number available
Click Next.
5. Add Coupons (Optional)
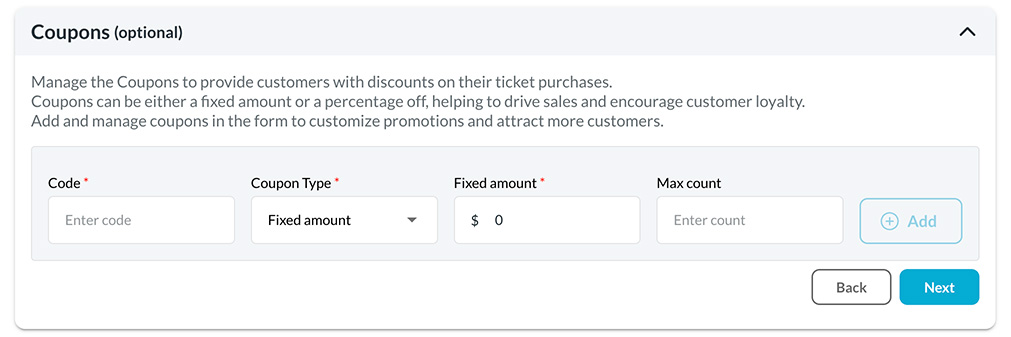
Coupons allow you to offer special discounts during checkout.
You can set:
- Coupon code
- Discount type (percentage or fixed amount)
- Discount value
- Maximum number of uses
Examples:
- SAVE10 → $10 off
- EARLY20 → 20% off
- VIPLIMITED → limited-use coupon
Click Next.
6. Personalize the Receipt
Add a custom message that will appear on each attendee’s ticket receipt.
This could be a thank-you message or instructions for event day.
7. Save Your Event

Click Save to store your event.
Note: Your event is still in draft mode. It must be published before the public can buy tickets.
8. Publish Your Event (Required for Ticket Sales)
To make your event live:
- Open your event in the dashboard
- Click Publish
Once published, tickets can be purchased immediately.
9. Your Event Appears on Your Campaign Page
After publishing, your event will automatically appear on your campaign page.
To find it:
- Visit ourmayberry.com/campaigns
- Search for your campaign name
Your event will be listed with your other offers and fundraising tools.
10. Embed Ticket Sales on Your Website
You can embed your ticket purchase page directly on your own website.
To get the embed code:
- Go to Resources in the left-side menu
- Select Events Page iFrame
- Copy the embed code
Recommended iFrame Height Adjustment
Website builders do not always display percentage heights correctly.
The default iFrame height is 100%, but we recommend replacing it with a fixed pixel height.
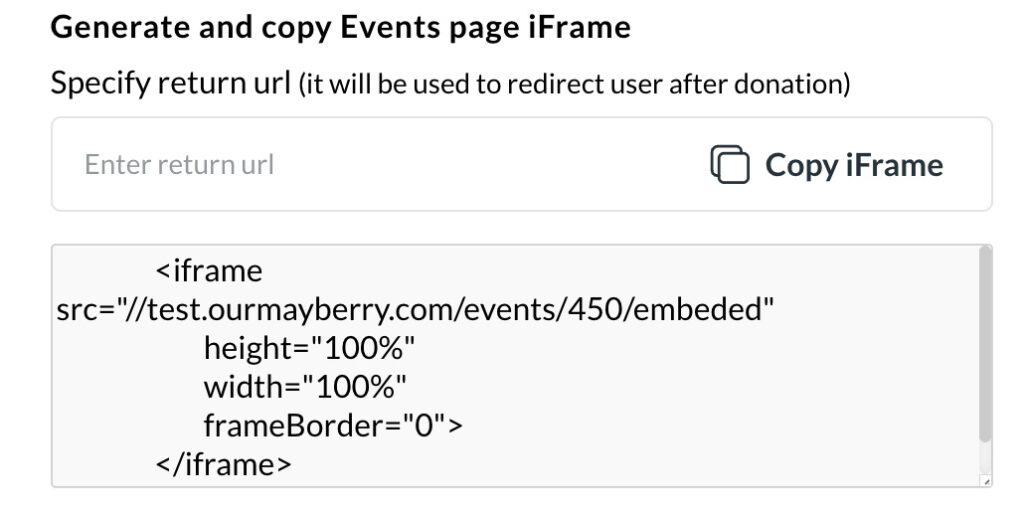
Start with:
height="1800"
Then preview the page on different device sizes and adjust the height as needed.
11. What Attendees Receive With Their Ticket
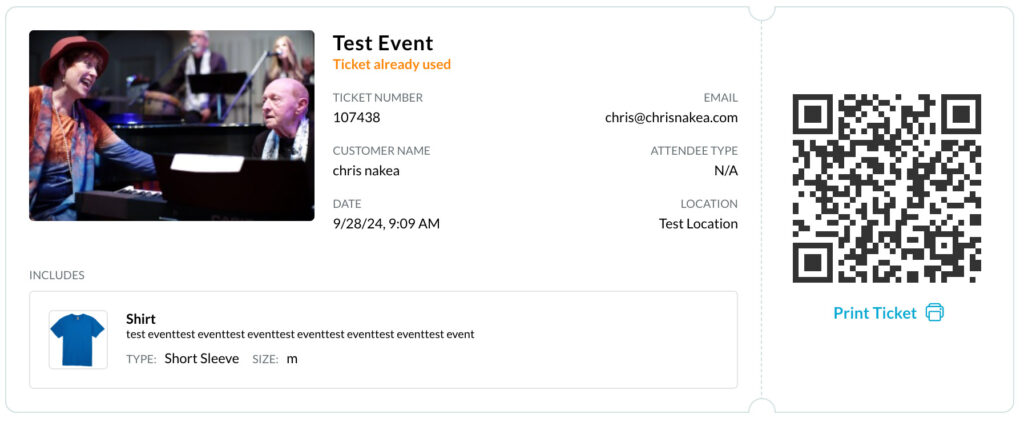
Every attendee automatically receives:
- An email with their ticket(s)
- A receipt
- A printable ticket shown immediately after purchase
- A Payberry Wallet account created automatically
The Payberry Wallet stores:
- Tickets
- QR codes
- Add-ons and packages
- Attendee details
How attendees log in:
- Enter the email used at purchase
- Confirm through a link sent to their email
- Create a password on first login
They can retrieve tickets anytime and pull up QR codes quickly from any device.
12. Checking Attendees In at the Event
Event organizers can check in attendees using two methods.
Method 1: Digital Check-In List
- Log in
- Open the event
- Click Manage Attendees
- Check people off as they arrive
Method 2: QR Code Scanning
- Use your phone to scan attendee QR codes
- The system will show:
- Whether the ticket is valid
- The attendee’s name
- Any packages or add-ons they should receive
This helps with fast check-in and distributing items like shirts, meals, or VIP passes.
Your Event Is Ready
With Our Mayberry, you can:
- Sell tickets
- Offer add-ons and merchandise
- Create packages and sponsorships
- Offer coupons
- Embed your ticket page anywhere
- Deliver digital tickets automatically
- Check attendees in smoothly